libgpiod yocto
Include the libgpiod and dependent libraries into your image with the following setting:
IMAGE_INSTALL:append = " libgpiod libgpiod-dev libgpiod-tools"testing libgpiod
Log in to your custom embedded system or connect via SSH.
Now you can use the libgpiod commands and see whether the implementation was successful.
Report gpio banks
First of all, you can detect how many gpio banks are installed.
Use the following command:
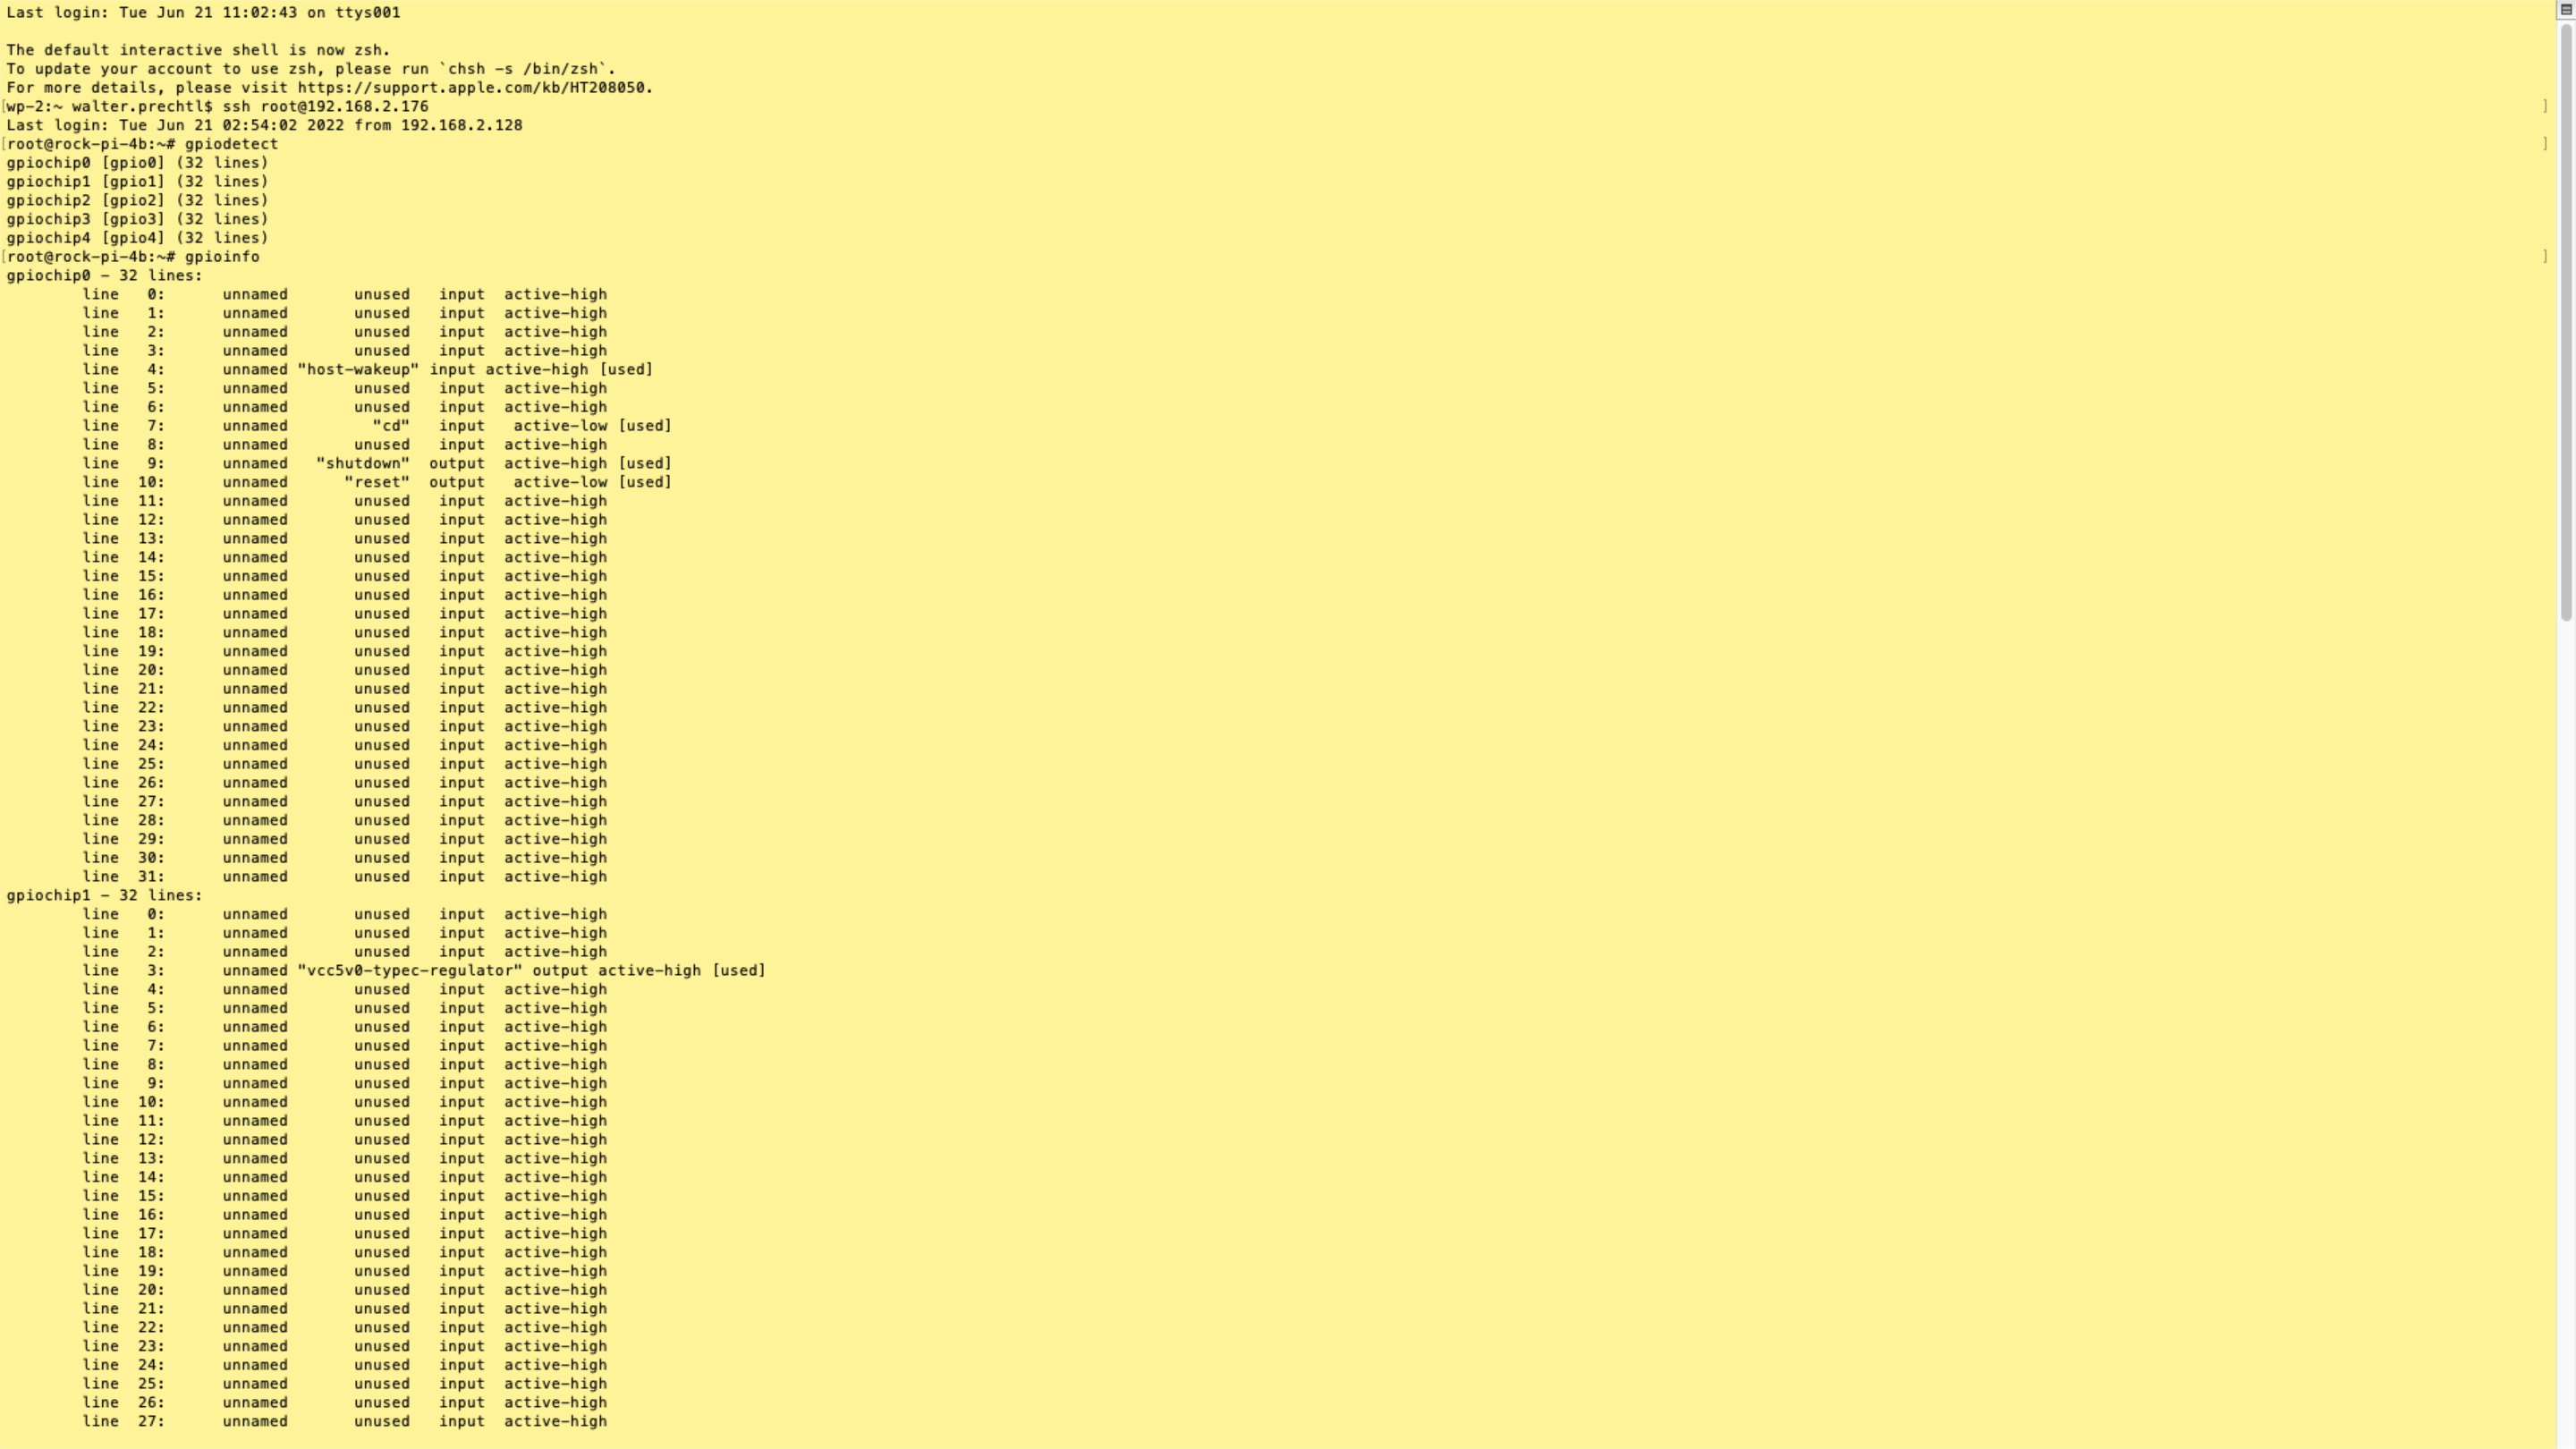
gpiodetectThe output should look like this:
gpiochip0 [gpio0] (32 lines)
gpiochip1 [gpio1] (32 lines)
gpiochip2 [gpio2] (32 lines)
gpiochip3 [gpio3] (32 lines)
gpiochip4 [gpio4] (32 lines)
Get all settings
To get all settings, use the following command:
gpioinfoThe output should look like this:
gpiochip0 - 32 lines:
	line   0:      unnamed       unused   input  active-high
	...
	line   4:      unnamed "host-wakeup" input active-high [used]
	line   5:      unnamed       unused   input  active-high
	line   6:      unnamed       unused   input  active-high
	line   7:      unnamed         "cd"   input   active-low [used]
	line   8:      unnamed       unused   input  active-high
	line   9:      unnamed   "shutdown"  output  active-high [used]
	line  10:      unnamed      "reset"  output   active-low [used]
	...
gpiochip1 - 32 lines:
	line   0:      unnamed       unused   input  active-high
	...
	line  31:      unnamed       unused   input  active-high
gpiochip2 - 32 lines:
	line   0:      unnamed       unused   input  active-high
	...
	line  31:      unnamed       unused   input  active-high
gpiochip3 - 32 lines:
	line   0:      unnamed       unused   input  active-high
	...
	line  31:      unnamed       unused   input  active-high
gpiochip4 - 32 lines:
	line   0:      unnamed       unused   input  active-high
	...
	line  29:   "GPIO4_D5"       unused   input  active-high
Set one GPIO line
To set GPIO line 29 on gpiochip4 to output and high, use the following command:
gpioset gpiochip4 29=1Copyright License
Copyright © 2022 Interelectronix e.K.
This Project source code is licensed under the GPL-3.0 license.

